 |
| American flag stars and stripes peyote ring by Lisa Yang Jewelry |
This peyote ring was made with celebrating the 4th of July in mind, but there are so many days and reasons to wear American flag jewelry. It is a great way to honor the courageous service people and remind ourselves of the freedoms we are so lucky to have.
The pattern was designed using BeadTool 4 software. The word chart, including the delica bead numbers and detailed pattern is provided at the end of the step by step beaded ring tutorial.
 |
| American flag peyote ring materials |
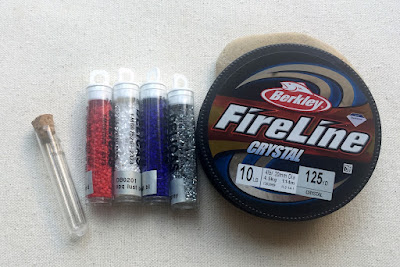
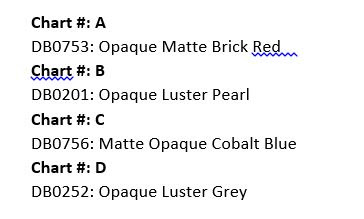
For this peyote ring, there are four different colors of Miyuki delica beads: (*this section contains affiliate links to Amazon)
- opaque matte brick red
- opaque luster pearl
- opaque matte cobalt blue
- opaque luster gray.
You may want to use galvanized silver delica beads for the stars instead of the gray (I wish I had). The galvanized silver color will stand out more against the blue background. The shade of gray I used could use more contrast.
The other materials are:
For peyote rings, I like to use a thicker FireLine beading thread than what I use for other peyote projects. This beaded ring is made with 10 lb. crystal thread and a size 11 Tulip beading needle. I find the stiffer FireLine helps the ring hold its shape better and I don’t need to worry about the thread breaking.
I don’t recommend using thread that is made of nylon, like Nymo, for beaded rings. Nylon threads tend to have some stretch and your ring will stretch out and become too large to wear. Trust me, I’ve lost several rings over time to stretch! Even peyote rings made with fishing type thread will stretch over time. For more information on choosing thread, check out this article What is the Best Thread for Beading? Nymo, FireLine or Something Else?
 |
| String a stop bead and beads for the first two rows. |
To follow the bead pattern, scroll to the end of the tutorial. I started the design with the stars and stripes section. This is helpful if you are trying to decide if the stars and stripes will go around the whole ring or just part of it. By starting with this area of the design, it helped me figure out when to change to the stripes by checking the size on my finger.
Start by adding a stop bead to your thread. You can use a different color and size bead for the stop bead like I did, which makes it easier to see. The stop bead will be removed before you zip up the ring.
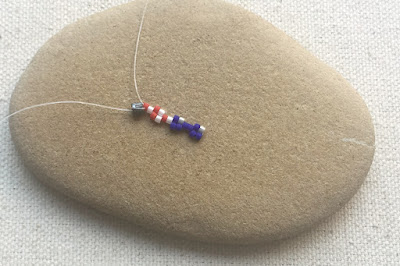
Pick up the beads for the first two rows of beads.
This project uses 2-drop even count peyote stitch. Two drop is very similar to regular peyote, but it is much quicker. Besides being quicker, sometimes patterns align better in 2-drop peyote. That is the case with this American flag pattern.
 |
| Pick up 2 beads and stitch through 2 beads |
To start weaving 2-drop peyote, pick up 2 beads, skip the last 2 beads from the original beads you strung and stitch through the next 2 beads.
In 2-drop peyote, you will always be picking up two beads at a time and stitching through two beads at a time. That is why it is a faster beadwork stitch. You can make a piece of beadwork that is twice as wide in about the same amount of time as you can with regular peyote stitch.
Continue to pick up 2 beads and stitch through 2 beads until you are at the end of the first row of beads.
 |
| Pull the thread tight and align the beads |
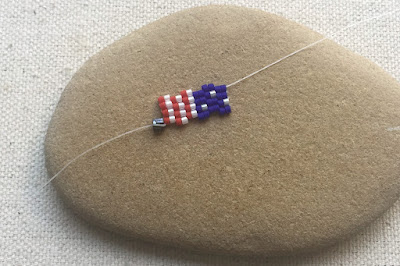
Pull the thread tight and move the beads with your fingers to align them so that there is a row of two beads stacked next to another set of two beads. It helps to use your needle to ease the beads into place.
 |
| Continue adding rows of 2-drop peyote following the bead pattern |
Continue adding 2-drop peyote stitched rows following the pattern.
The pattern for the stripes is very easy to follow, but the stars are a little more difficult. Once you have added the first row of blue beads for the stars, you will see the pattern that each star is that it is completely surrounded by blue beads before another silver star bead is added. Hopefully that helps you a little.
 |
| Check the size of the ring using a paper template |
To size a beaded ring, you can use a paper template. Wrap a strip of paper around the finger that you want to wear the ring on and make a mark where the paper overlaps. That is approximately how long the beadwork should be. As the ring gets close to that size, you can also wrap it around your finger to make sure the ends align properly.
The paper template also helps to measure where to change the pattern from stars and stripes to just stripes. For my ring, I wanted the stars to go halfway around my ring. That way no matter how the ring turns, you will always see part of the star design of the flag.
To measure how large a section should be stars, I folded the ring template in half and beaded up to the fold with the stars and stripes section.
 |
| Finish the red and white stripe section of the ring |
Once the stars section of the ring is complete, the ring is really fast to make! The stripes portion is an easy pattern of picking up one red and white bead for each stitch.
But don’t get too complacent. The easier the pattern, the easier it is to make a mistake and pick up the wrong beads. Always check your work to avoid having to undo a section. If you do have to remove beads, I find it is easier (and safer) to remove the needle and pull the thread out of the beads. If you try to stitch back through the beads, it is very likely you will split the thread by stitching through it – and that is very hard to fix!
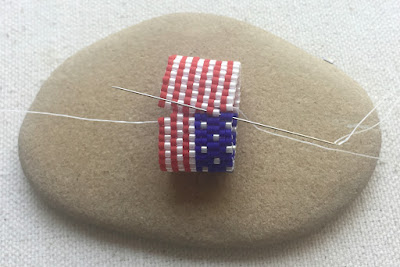
Stitch until your beadwork matches your template and wraps snugly around your finger. Note that the ends must be able to zip together, which means there is high (or out) bead on one side and a corresponding low (or in) bead section on the other side of the row. The beads on either side will mesh together like the two sides of a zipper, which is why it is called zipping the beadwork together.
 |
| Zip the ends of the ring together |
Fold the sides of the ring together and begin stitching through the high beads on either side of the ring. This will pull the sides of the ring together and complete the circle.
Be sure to continue stitching through two beads at a time.
 |
| Knot the tail and working threads together to secure the ring |
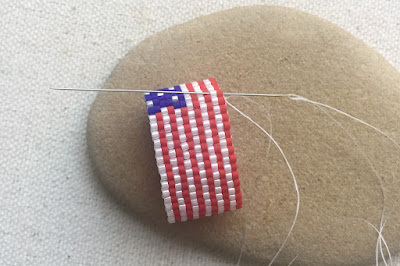
When you have zipped through the entire row, the two thread ends (tail thread and the working thread) will be side by side. Although I don’t always add knots to my beadwork, this is the perfect place to tie off the threads with a square knot. Pull the knot securely. In my experience, your ring will stretch and eventually pull apart if you don’t secure it with knots.
 |
| Weave the thread ends into the beadwork |
After adding the square knot, continue stitching up and down the row two beads at a time. You want to be sure you go through the rows next to where you joined the side of the ring. This will help reinforce the ring. I like to stitch through the center rows for 4 or 5 rows before I reverse direction and tie off my thread.
 |
| Move the thread to the inside of the ring to trim ends |
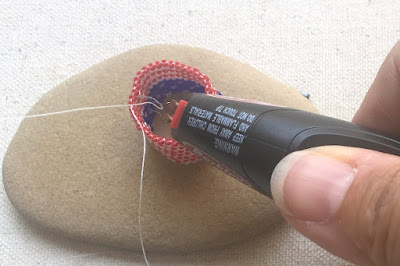
When it is time to end the thread, weave it to the inside of the ring. Then use a thread burner to cut the thread as close as possible to the beadwork.
This helps to prevent the small end of the thread from poking between two beads on the outside of your ring.
Remove the needle from the working thread and add it to the tail thread. Weave in the tail thread the same way you did for the working thread, but in the opposite direction on the beadwork.
 |
| Completed American flag 2-dop peyote ring |
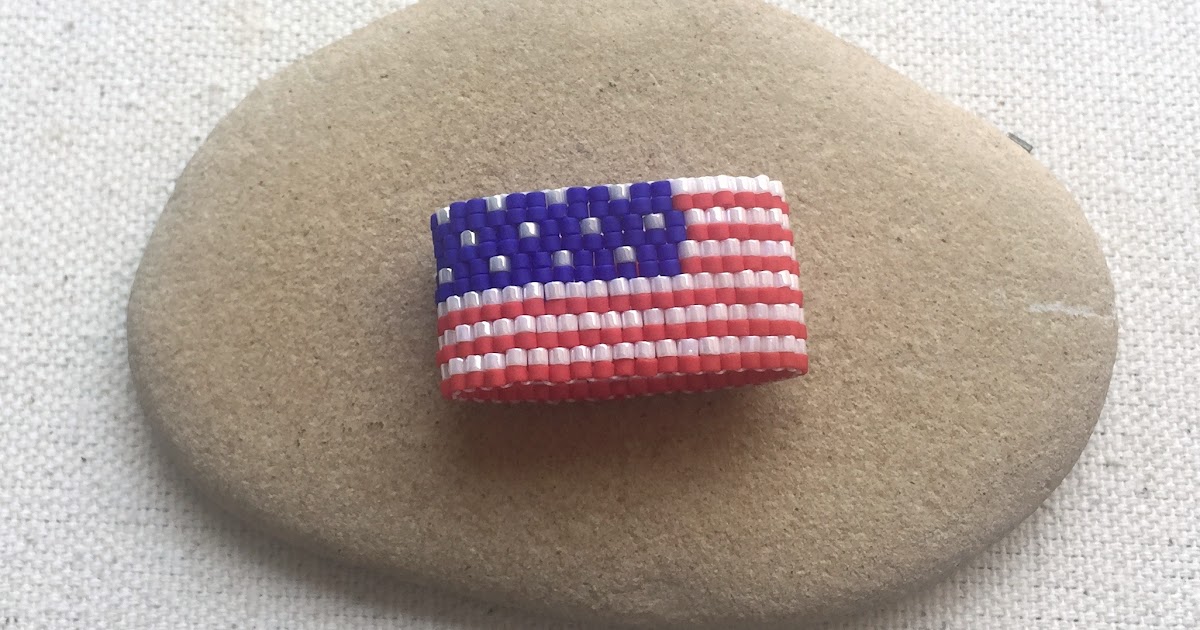
Here is the finished ring. You can wear it so the stars and stripes pattern faces toward you or away from you.
 |
| Stars and stripes 2-drop peyote ring |
Another possibility for this ring pattern is if you were to continue stars and stripes around the entire ring. Then your finished ring would look like this.
The last two pictures are the same ring. Because my stars and stripes go half way around the ring, I can make it appear that it goes around the entire ring by how much of it I show in the front.
Similarly, I can make it look like the ring is just red and white stripes by turning that section to the front. How versatile!
These are the size 11 Miyuki delica colors that I used for my ring. Again, I recommend galvanized silver for color D.
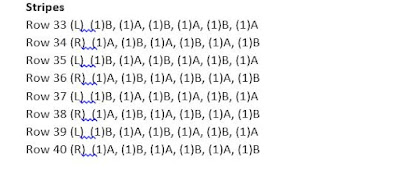
Above is the word pattern for the stars and stipes section of the peyote ring. I only put in sections of the pattern up until the areas where the pattern repeats.
For example, the stars and stripes section, row 3 begins repeating at row 11. That means you can work your pattern until row 10 and then go back to row 3 to continue the stars and stripes until you decide this pattern is long enough.
Similarly, the pattern for the stripes repeats every two rows. You just keep making the stripes until your ring is long enough
 |
| American Flag pattern copyright Lisa Yang Jewelry |
Here are all of the instructions and bead information put together on a single picture – including the bead diagram. Have fun creating and God Bless America!
More peyote ring designs:




:max_bytes(150000):strip_icc():focal(999x0:1001x2)/rita-moreno-2024-oscars-031024-54cb2c55c28543c6893ec395fd29d6de.jpg)


